Color Tracking
We call it color tracking, but more often than not people simply refer to this technique as Changing material paramaters with GL.Color, sometimes it's also refered to as color material mode
Earlyer we saw that OpenGL uses the current material color (set with GL.Material) when lighting is enabled, but uses the current primary color (set with GL.Color) when lighting is disabled. This inconsistency can often get confusing. It's also slightly more expensive to call GL.Material than it is to call GL.Color because of the safety checks the functions do. Whenever you change a materials color, most often you only change the diffuse and ambient components.
color mateiral mode adresses these issues. When you enable color material mode, certain current material colors track the current primary color instead. To use color materials, you must first enable them:
GL.Enable(EnableCaps.ColorMaterial);
This will cause calls to GL.Color to change not only the primary color, but also the current ambient and diffuse material colors. Of course you can change which properties color tracking affects by calling GL.ColorMaterial.
We've already discussed how to change which color is tracked in the Defining Materials section.
Example 1
Lets make a new demo scene, call it ColorTrackingDemo and get it up to par with the test scene. Once you have that:
- In the initialize function
- Call
GL.Mateiralto:- Set the specular component to white
- Set the shininess to 20
- Enable color material
- Set color materials to track the ambeint AND diffuse components for front and back face
- Call
- In the render function
- Set the first spheres render color to red
- Set the second spheres render color to green
- Set the third spheres color to blue
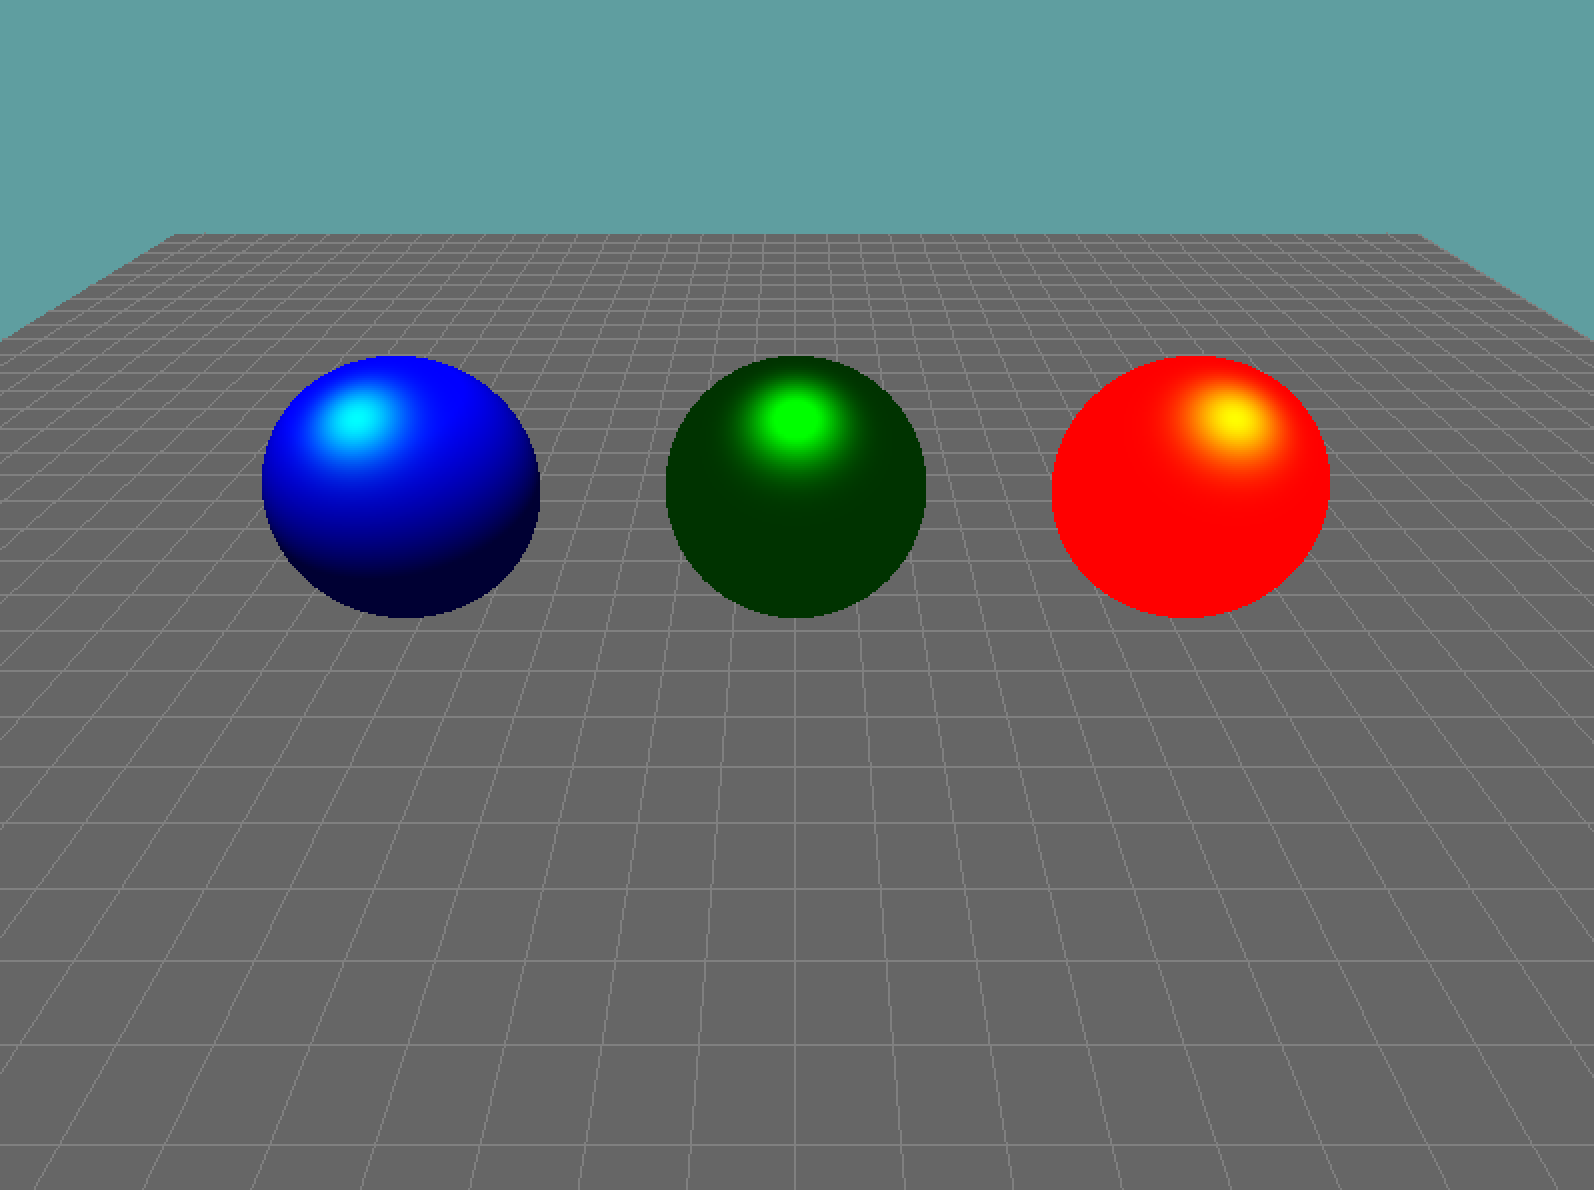
Your scene should look like the below image:
In case your scene doesn't look like that, here is the code i used to get that result
 public override void Initialize() {
    base.Initialize();

    // Enable lighting and configure light 0

    GL.Material(MaterialFace.FrontAndBack, MaterialParameter.Specular, new float[] { 1, 1, 1, 1 });
    GL.Material(MaterialFace.FrontAndBack, MaterialParameter.Shininess, 20.0f);

    GL.Enable(EnableCap.ColorMaterial);
    GL.ColorMaterial(MaterialFace.FrontAndBack, ColorMaterialParameter.AmbientAndDiffuse);
}

public override void Render() {
    // Set up view matrix

    // Render unlit grid

    GL.Color3(1f, 0f, 0f);
    // Draw first sphere

    GL.Color3(0f, 1f, 0f);
    // Draw second sphere

    GL.Color3(0f, 0f, 1f);
    Draw third sphere
}
The most important thing to note here is the shading. Because of the way the shading model works, the blue sphere gets a lot of diffuse light, the other two get too much ambient. Let's fix that!
Example 2
Using Example 1 as our starting point.
- In initialize
- Change the color material tracking point to diffuse
- Set the materials default ambient to { .2f, .2f, .2f, 1f }
Here is the code change
// This is new
GL.Material(MaterialFace.FrontAndBack, MaterialParameter.Ambient, new float[] { .2f, .2f, .2f, 1f });
GL.Material(MaterialFace.FrontAndBack, MaterialParameter.Specular, new float[] { 1, 1, 1, 1 });
GL.Material(MaterialFace.FrontAndBack, MaterialParameter.Shininess, 20.0f);

GL.Enable(EnableCap.ColorMaterial);
// This changed
GL.ColorMaterial(MaterialFace.FrontAndBack, ColorMaterialParameter.Diffuse);
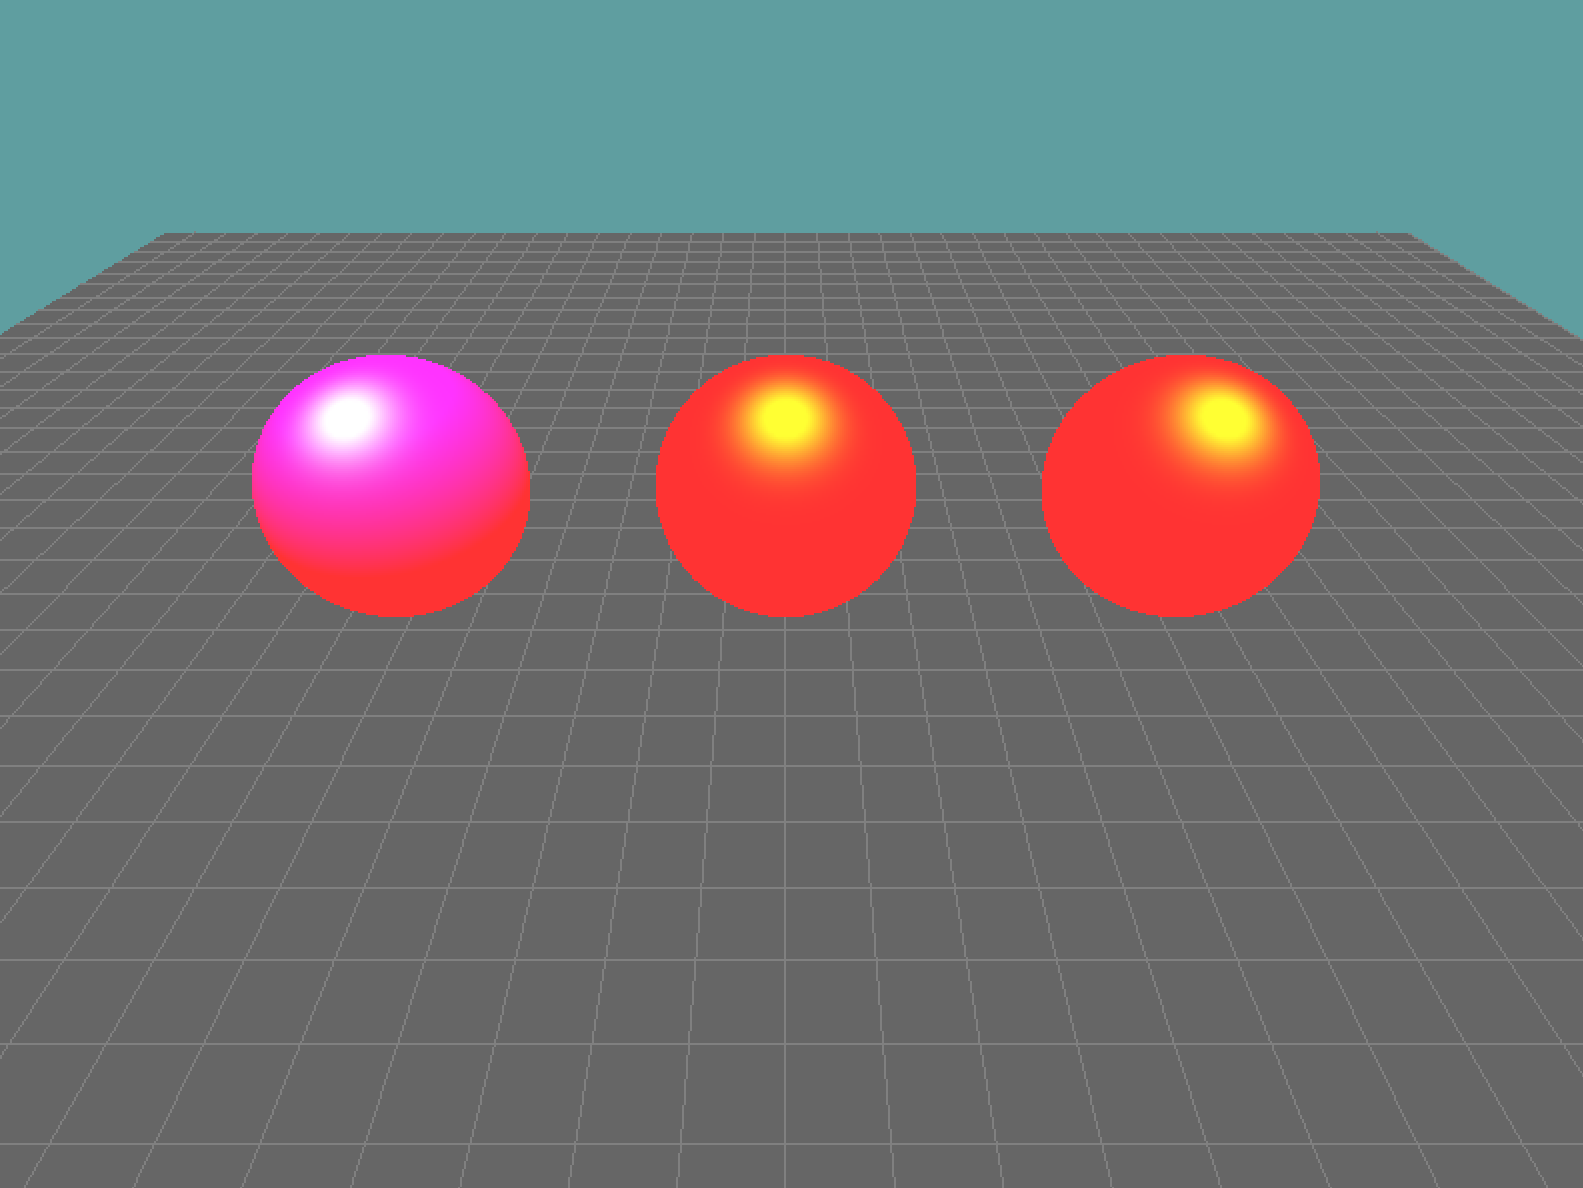
This still doesn't look great. All the spheres now take a uniform ambient term, but only the blue sphere has a blue term to take for it's diffuse! That's why the other two look red-ish.
Example 3
The key to good material usage is to think about color a little differently! Instead of thinking about a light having a color and a material having a color, think of the light as an overall brightness (always have a white light), and the mateiral as the color.
We're going to be using example 1 (not example 2!) as a starting point. That is, the color material is going to track both the ambient and diffuse terms. The sphere colors are set with GL.Color3, they are: red, green and blue. This is the starting point.
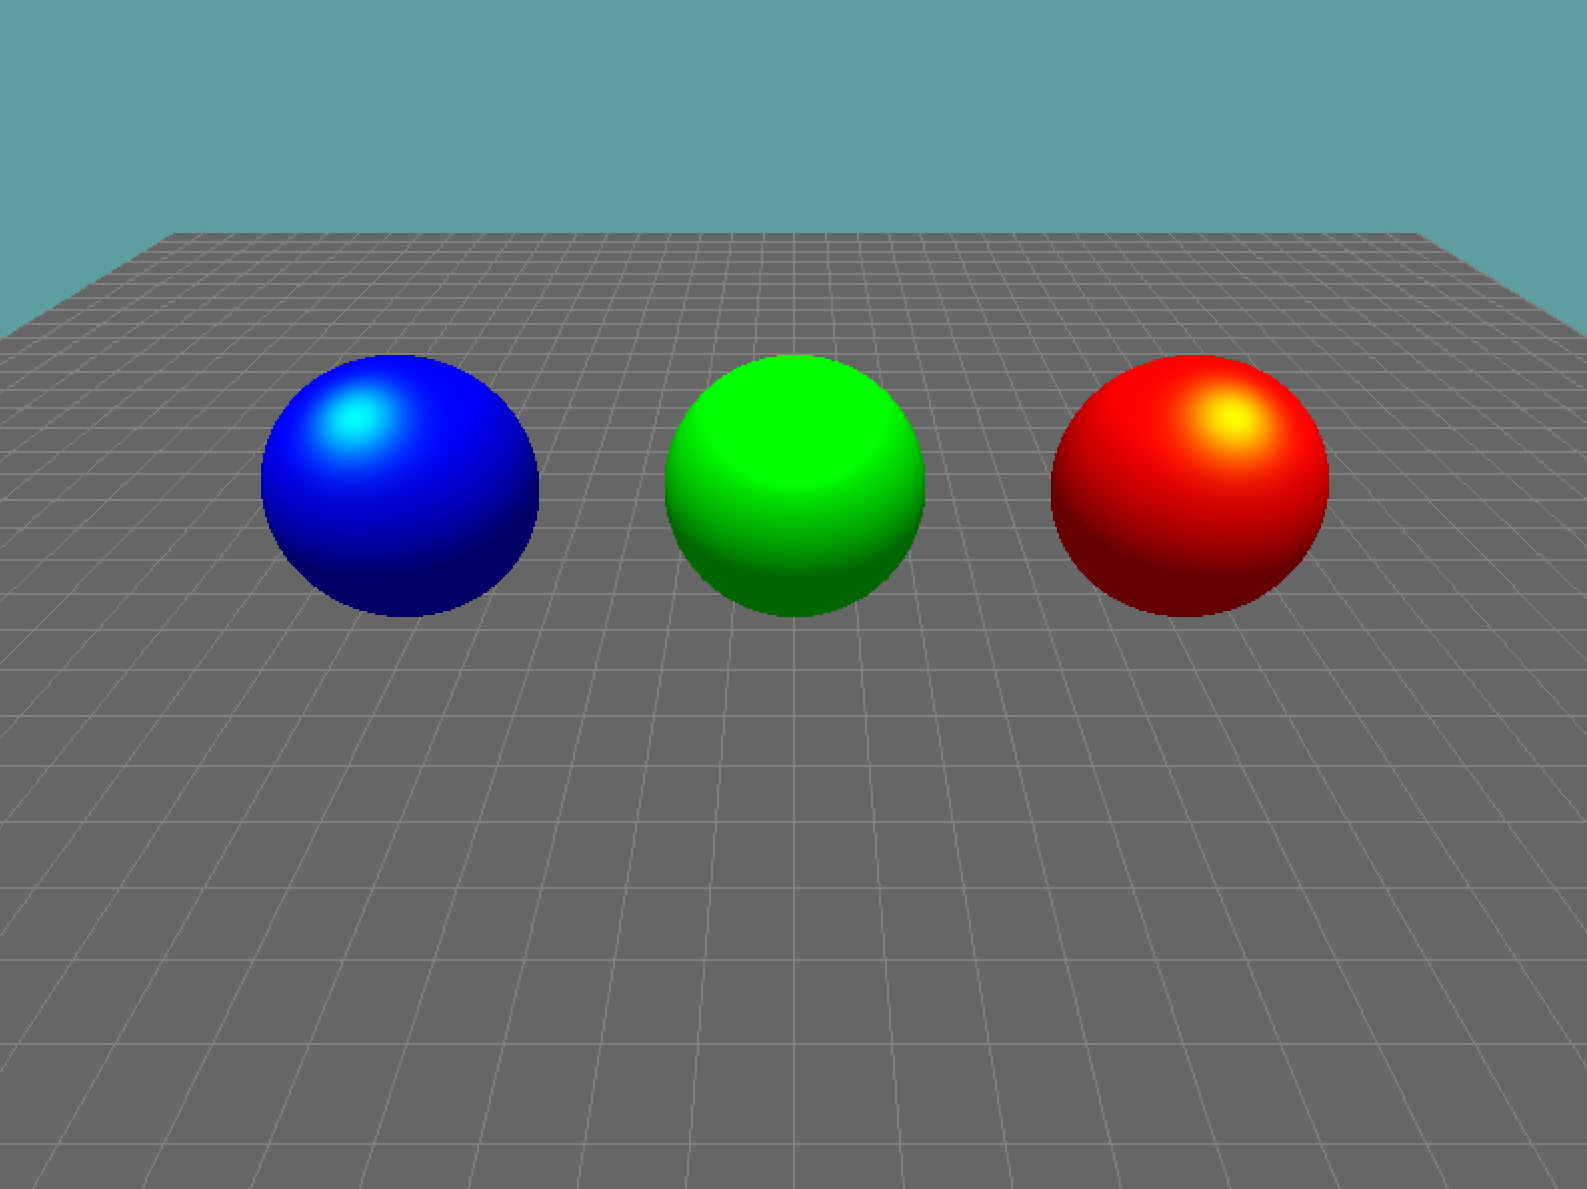
Now, change the LIGHT (not material) ambient color to { 0.2f, 0.2f, 0.2f, 1.0f } and the LIGHT (not mateiral) diffuse color to {0.8f, 0.8f, 0.8f, 1.0f }. Run the game and your scene looks the way one would expecte it:
Only the initialize function changed from example 1, here it is in its entirety:
public override void Initialize() {
base.Initialize();

GL.Enable(EnableCap.Lighting);
GL.Enable(EnableCap.Light0);

float[] red = new float[] { 1, 0, 0, 1 };
float[] blue = new float[] { 0, 0, 1, 1 };
float[] white = new float[] {0, 1, 0, 1 };

// We changed the LIGHT! Not the Material
GL.Light(LightName.Light0, LightParameter.Position, new float[] { 0, 1, 1, 0});
GL.Light(LightName.Light0, LightParameter.Ambient, new float[] { .2f, .2f, .2f, 1f });
GL.Light(LightName.Light0, LightParameter.Diffuse, new float[] { .8f, .8f, .8f, 1f } );
GL.Light(LightName.Light0, LightParameter.Specular, white);

GL.Material(MaterialFace.FrontAndBack, MaterialParameter.Specular, new float[] { 1, 1, 1, 1 });
GL.Material(MaterialFace.FrontAndBack, MaterialParameter.Shininess, 20.0f);

GL.Enable(EnableCap.ColorMaterial);
GL.ColorMaterial(MaterialFace.FrontAndBack, ColorMaterialParameter.AmbientAndDiffuse);
}
This works because the light now defines how strong the ambient and diffuse components are. The actual material defines the color. Because if the material diffuse is blue (0, 0, 1) and the light diffuse is (.8, .8, .8) then the two multiplied together create the objects diffuse (0, 0, .8).
This (example 3) is the configuration i do 90% of my lighting with! It's something you should be comfotrable setting up.